I’ve started using the new Microsoft Teams toolkit, which is a Visual Studio Code extension and generator for Teams applications. One thing I noticed is a little challenge when creating tabs, and that’s due to the requirement to use SSL. The documentation is fine and explains how to trust your local project, but I found it a little painful since the certificates only last 1 month and there’s a different one for each project, so I need repeat the process frequently. Your teammates will need to do that as well.

Here is an alternative approach in which you create your own certificate authority and build certs from that so you can install just one root certificate across all your projects! Each teammate can have their own certs, so you can collaborate as much as you wish and nobody has to go installing certs.
NOTE: Did you know that the Teams Toolkit uses Create React App (CRA) for tabs? Create React App is a toolchain from Facebook (who created React in the first place) it’s very popular and well supported! If you need help, search on “Create React App” and you can find a plethora of helpful articles; this one helped me figure this out!
Step 1: Create and trust a certificate authority (CA)
This step only needs to be done once for as many projects as you wish. It assumes you already have Node.js installed, as required by the Teams Toolkit.
a. Create a safe/private folder somewhere and go there in your favorite command-line tool, and run these commands:
npm install -g mkcert
mkcert create-ca --organization "MyOrg" --validity 3650
mkcert create-cert --ca-key "ca.key" --ca-cert "ca.crt" --validity 3650
NOTE: 3650 is the number of days your certs will be valid; feel free to change it. You can use
--helponmkcertto reveal other options, such as setting an organization name and location (the default org is “Test CA”) and customizing the domain names for your certificate (the default is “localhost,127.0.0.1”).
This will create a new Certificate Authority and a certificate that was issued from it. You should see 4 files:
| File | Description |
|---|---|
| ca.crt | Certificate for your new CA |
| ca.key | Private key for your new CA |
| cert.crt | Certificate for use in projects |
| cert.key | Private key for use in projects |
b. Now you need to trust the certificate for your new CA; by doing that any cert you create will be trusted with no additional action on your part.
On Windows
- Double click on the
ca.crtfile and click “Install Certificate”.
- Choose Local Machine and click next.

- Select “Place all certificates in the following store” and then click the “Browse” button. Choose “Trusted Root Certification Authorities” click “OK” to close the dialog box, and then click “Next”.

- Restart all instances of your browser to force it to re-read its trusted roots. If in doubt, reboot your computer.
On Mac
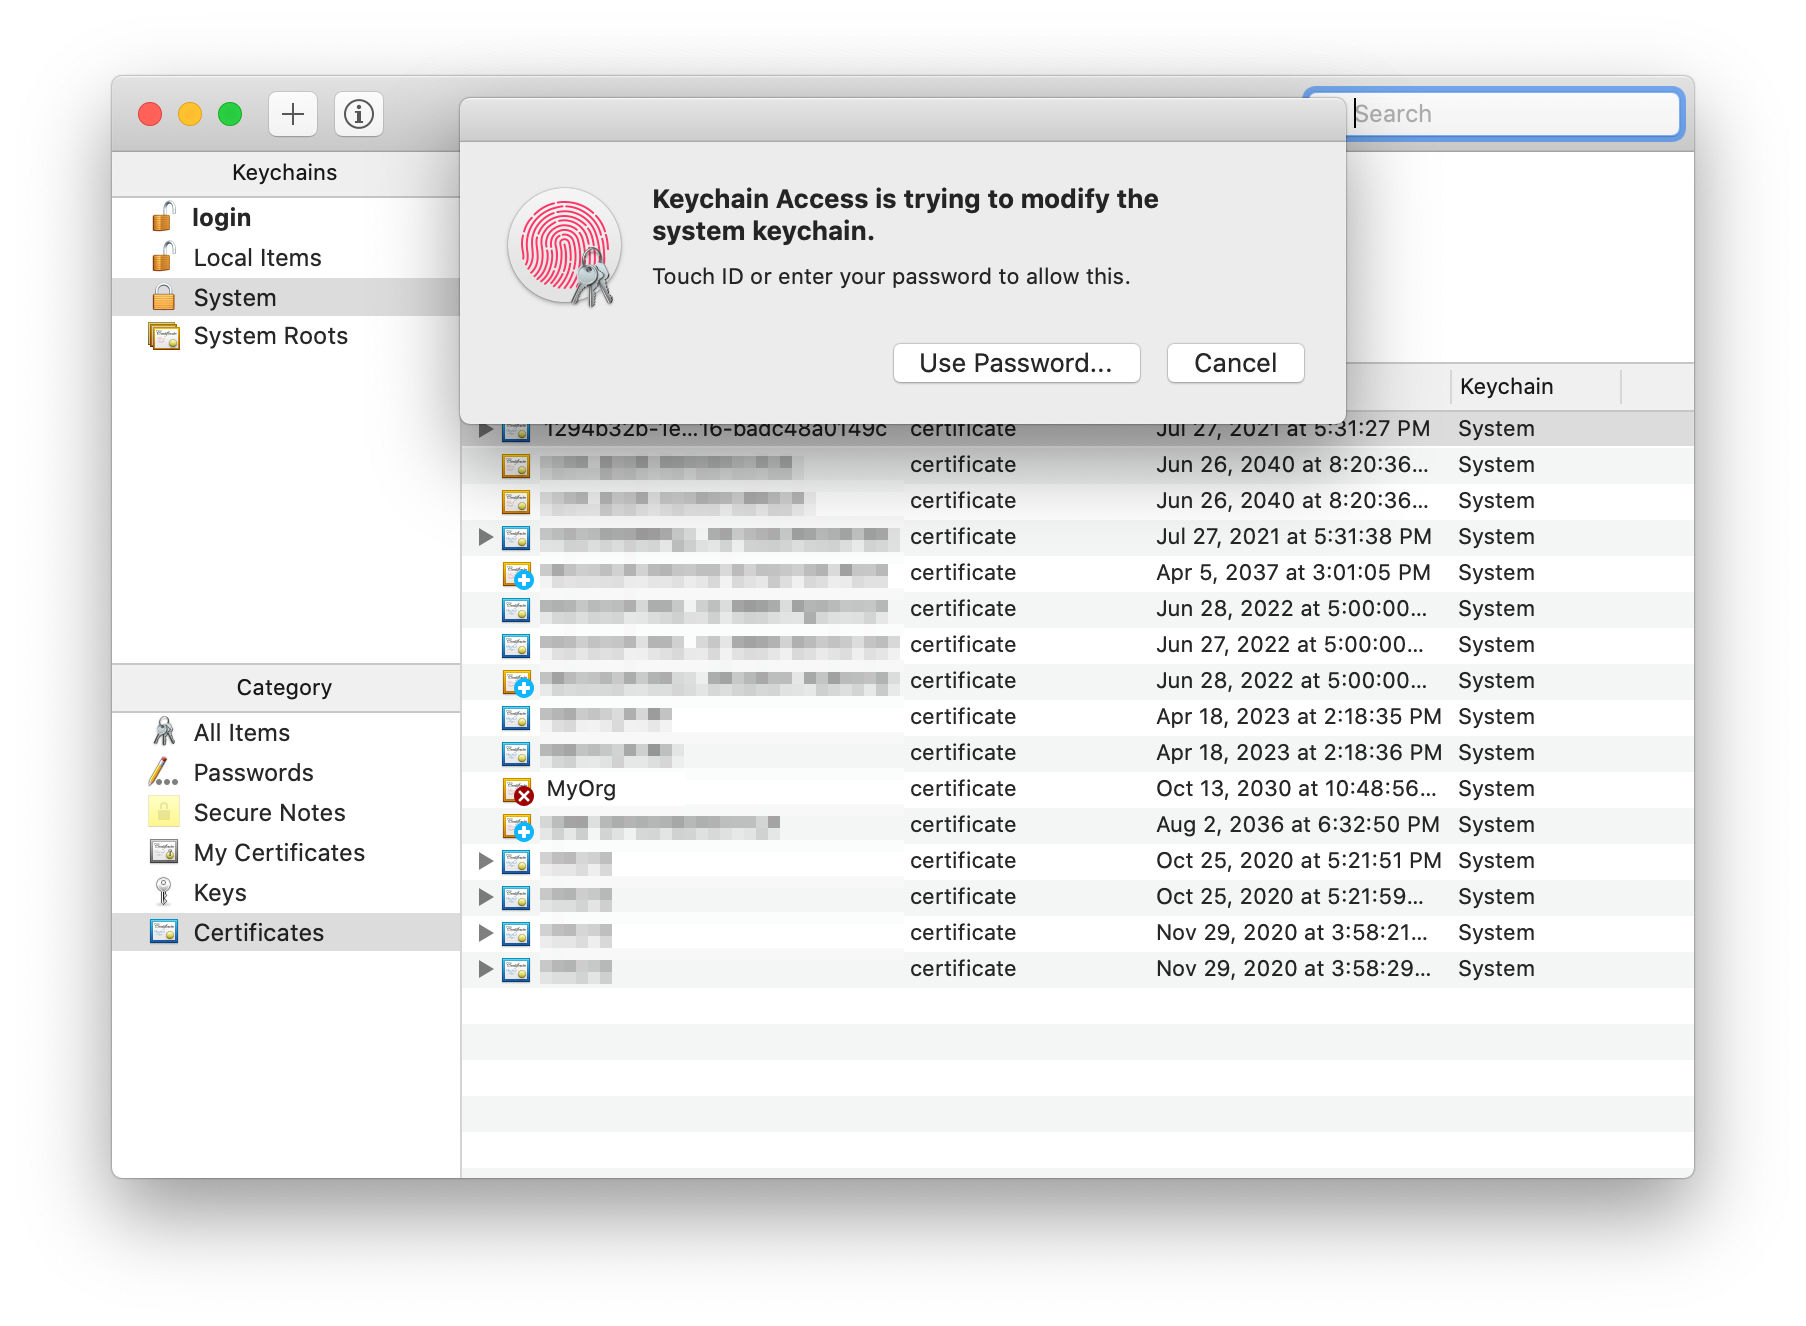
- Double click on the ca.crt file, which should be found under
/Users/[your-name]/. It will launch Keychain Access app. - Enter your password or use Touch ID when prompted.

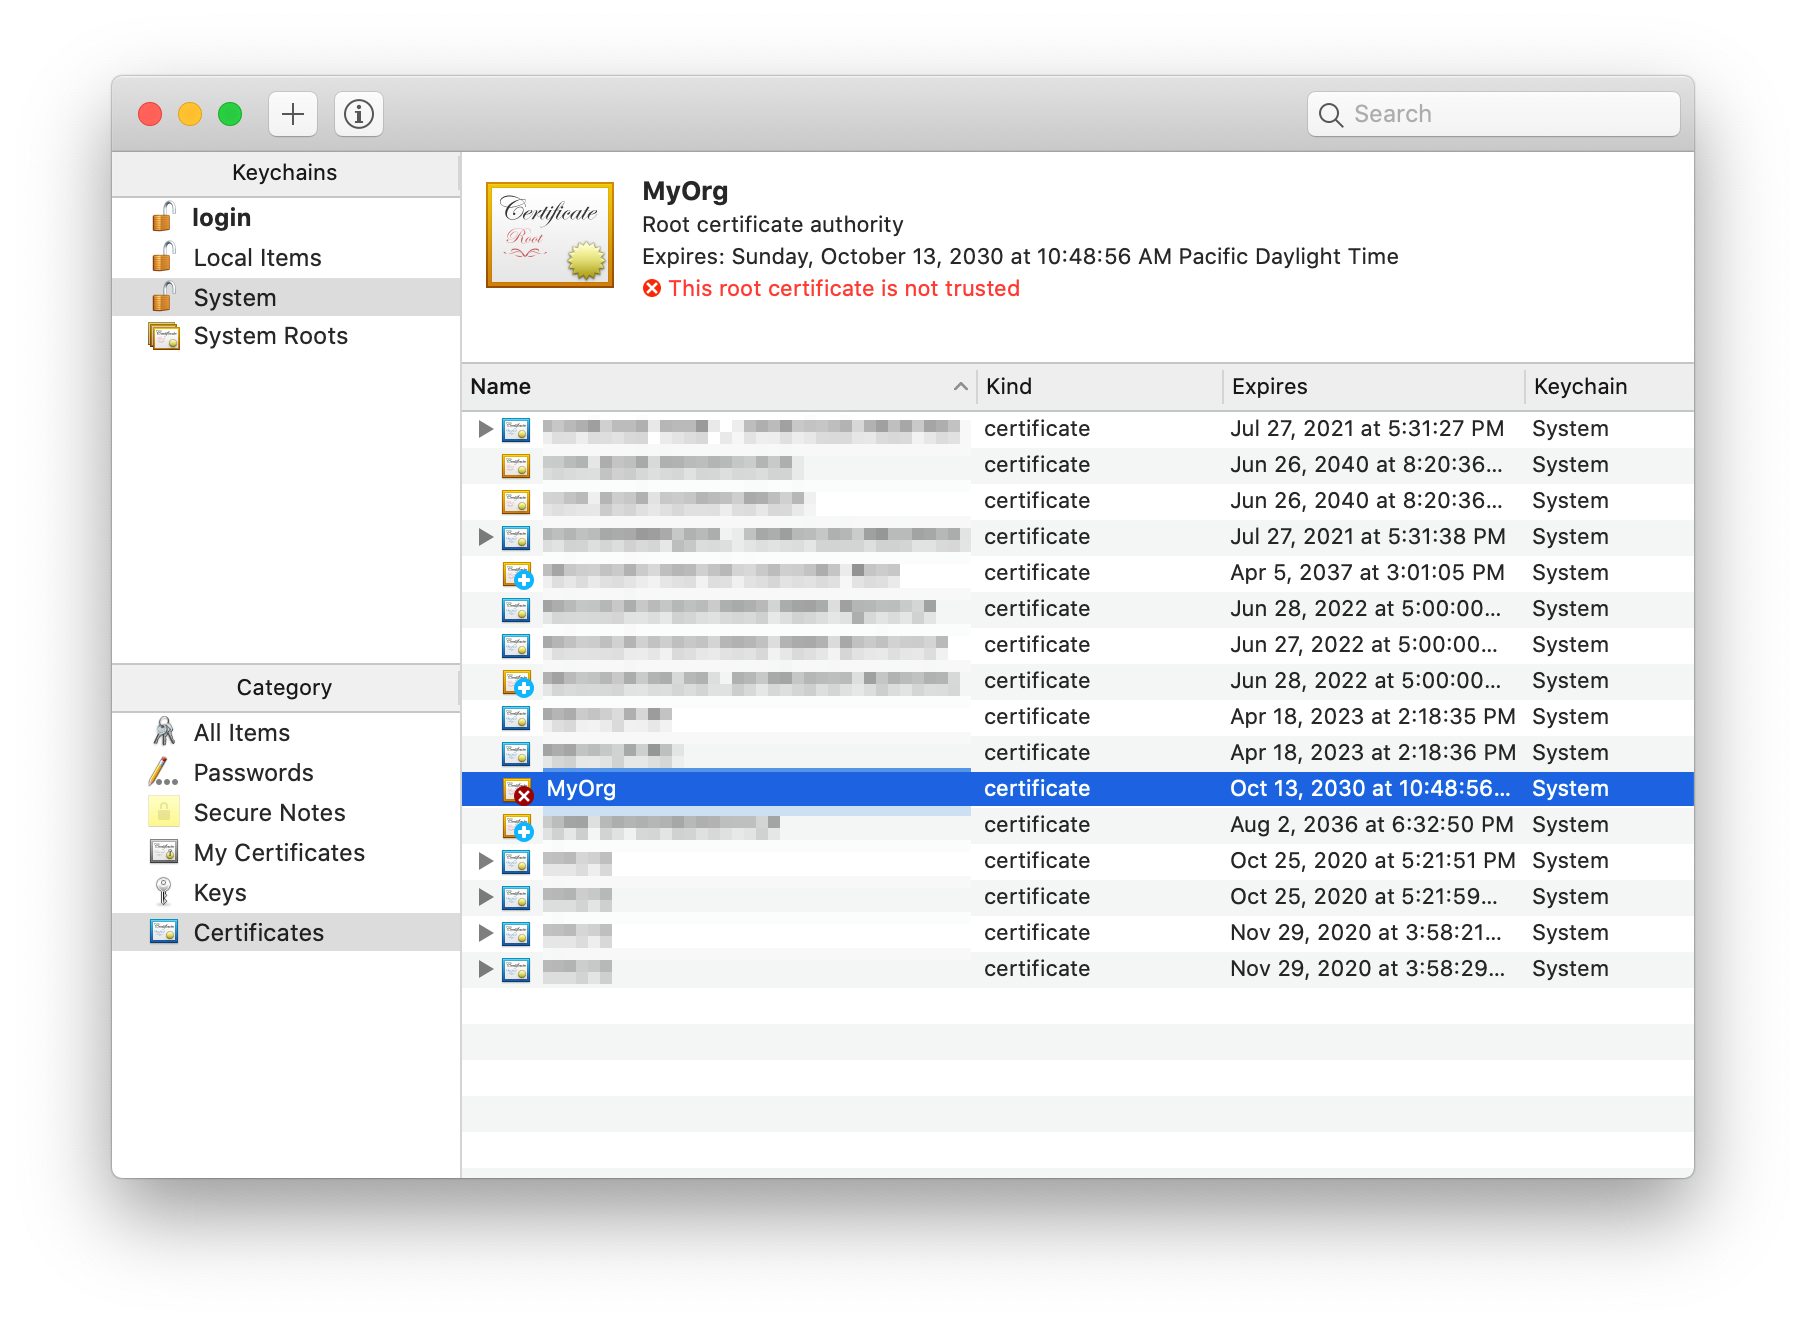
- The new certificate (in this case, “MyOrg”) should be added. Double-click it.

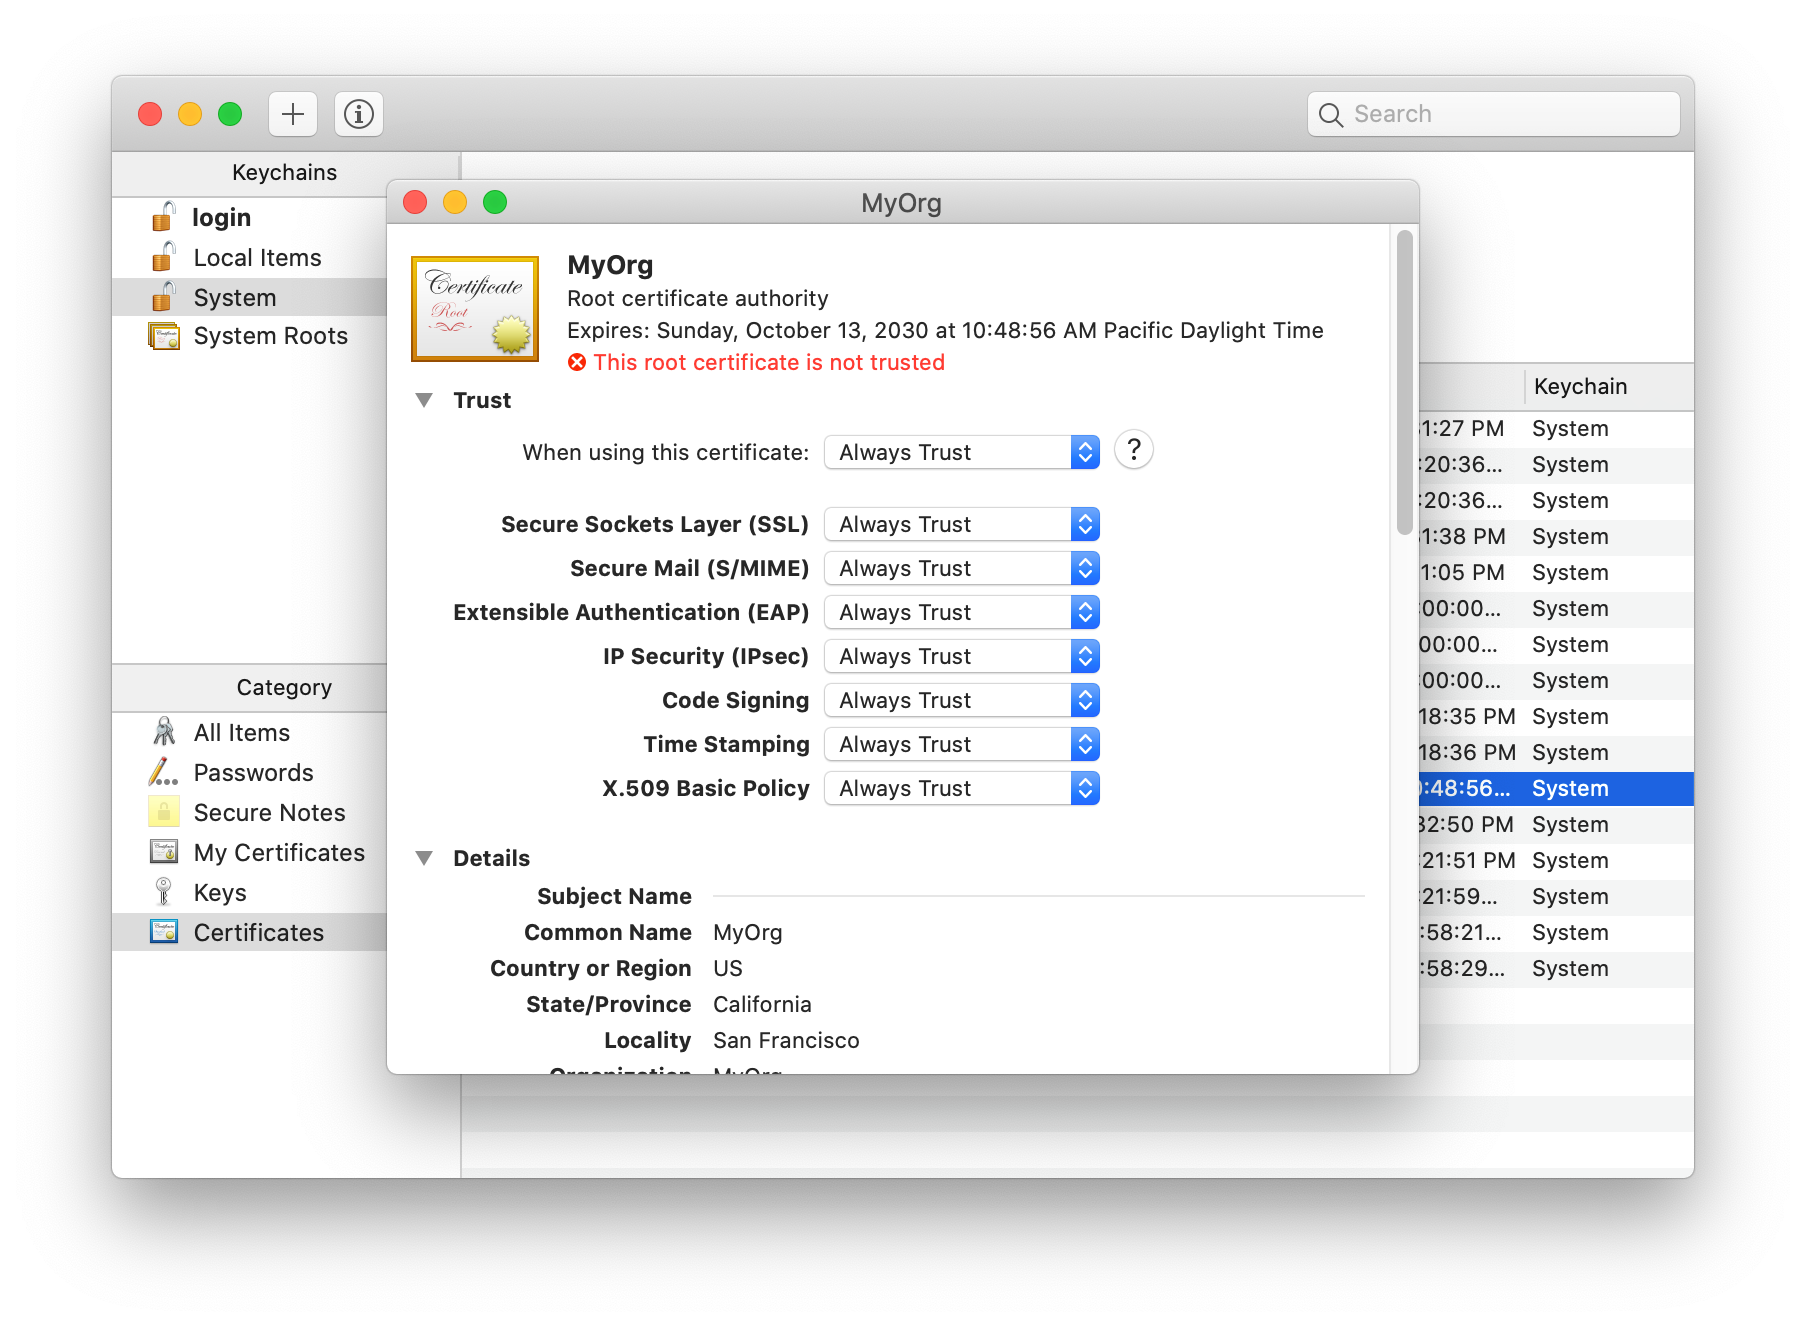
- In a new window, expand the Trust section of the certificate details. Select “Always Trust” for every option.

- Close the window. Enter your password or use Touch ID again if you are asked. Now the certificate is trusted.

- Restart all instances of your browser to force it to re-read its trusted roots. If in doubt, reboot your computer.
On Linux
There are more steps on Linux as most browsers don’t use the operating system’s certificate store, and a tool called certutil is needed to modify the browsers’ cert?.db files. This article explains how to install your new root certificate on Linux.
Step 2 – Add the certs to your project
This is what you need to do for each project.
a. Create a new folder in your project folder (the same level as the package.json file) called .cert. Copy the cert.crt and cert.key files into this folder.
b. Modify your .env file to tell the local web server to use your cert:
HTTPS=true
SSL_CRT_FILE=./.cert/cert.crt
SSL_KEY_FILE=./.cert/cert.key
c. Prevent saving the certs to your git repository by adding a line to the .gitignore file.
.cert
Azure Active Directory SSO Tabs
Tabs that implement Azure Active Directory Single Sign-On need to implement more than just a web page; they need to implement a web service to exchange the SSO token for an access token that the app can use to call downstream services such as the Microsoft Graph. This is explained in this blog article, or this one, more clearly than in the documentation.
When yo teams generates an SSO tab, this web service is hosted using the same web server as the page itself.
When the Teams Toolkit generates one, however, it creates a separate web service for the web service so there really are two endpoints that need to be SSL enabled. The web service is in a folder called api-server. To enable SSL here, follow these steps:
- Add these lines to the
api-server\.envfile.
HTTPS=true
SSL_CRT_FILE=../.cert/cert.crt
SSL_KEY_FILE=../.cert/cert.key
CORS_ORIGIN=https://devappsforteams.local:3000
2. Immediately above the line app.get('/getGraphAccessToken') in server.ts or server.js, add these lines to allow the cross-origin call from the web page (port 3000) to the web service (port 5000):
const cors = require('cors');
app.use(cors({
    origin: process.env.CORS_ORIGIN
}));
3. Near the bottom of the same file, replace the line
app.listen(port);
with this code:
const fs = require('fs');
const https = require('https');
var privateKey = fs.readFileSync(process.env.SSL_KEY_FILE );
var certificate = fs.readFileSync(process.env.SSL_CRT_FILE);

https.createServer({
    key: privateKey,
    cert: certificate
}, app).listen(port);
Working in a team
Each team member needs to do Step 1 on their computer just once. When a developer starts working on a project they can simply copy their .cert folder into their project and go to work.
Many thanks to my colleague Tomomi Imura for documenting the Mac instructions and providing screen shots.
Do you have ideas on how to do this better, especially in a project team? Please chime in using the comments; thanks!